Setting up Scarf Packages
Prerequisites
-
You will need to sign up for a Scarf account.
Note: You can sign up with a valid email address or your GitHub account.
-
To track a container, it must be published to a public registry; eg Docker Hub, GitHub Container Registry.
Note: This guide will use the
hello-worlddocker image.
Docker Packages
Creating a Docker Package
Using Scarf, users can pull your Docker container images via Scarf Gateway using your custom domain.
- Once signed in to Scarf, navigate to the home page.
- Click plus icon in the top navigation, then select
New Package.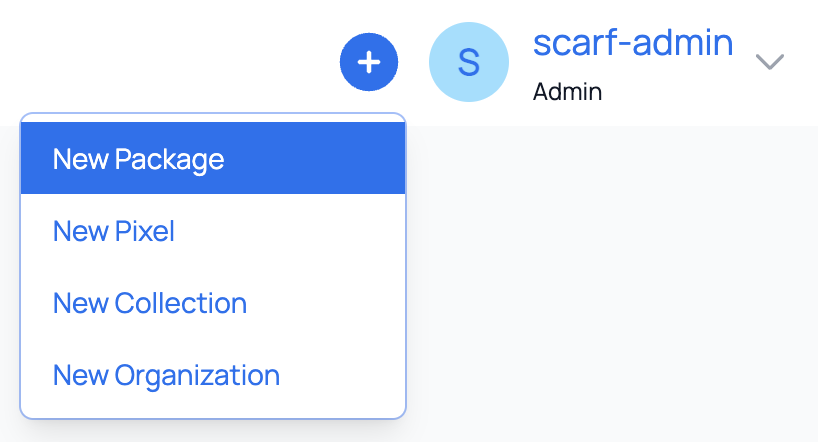
- In the first drop-down click on the package type you would like to create. For this section you will click
Docker.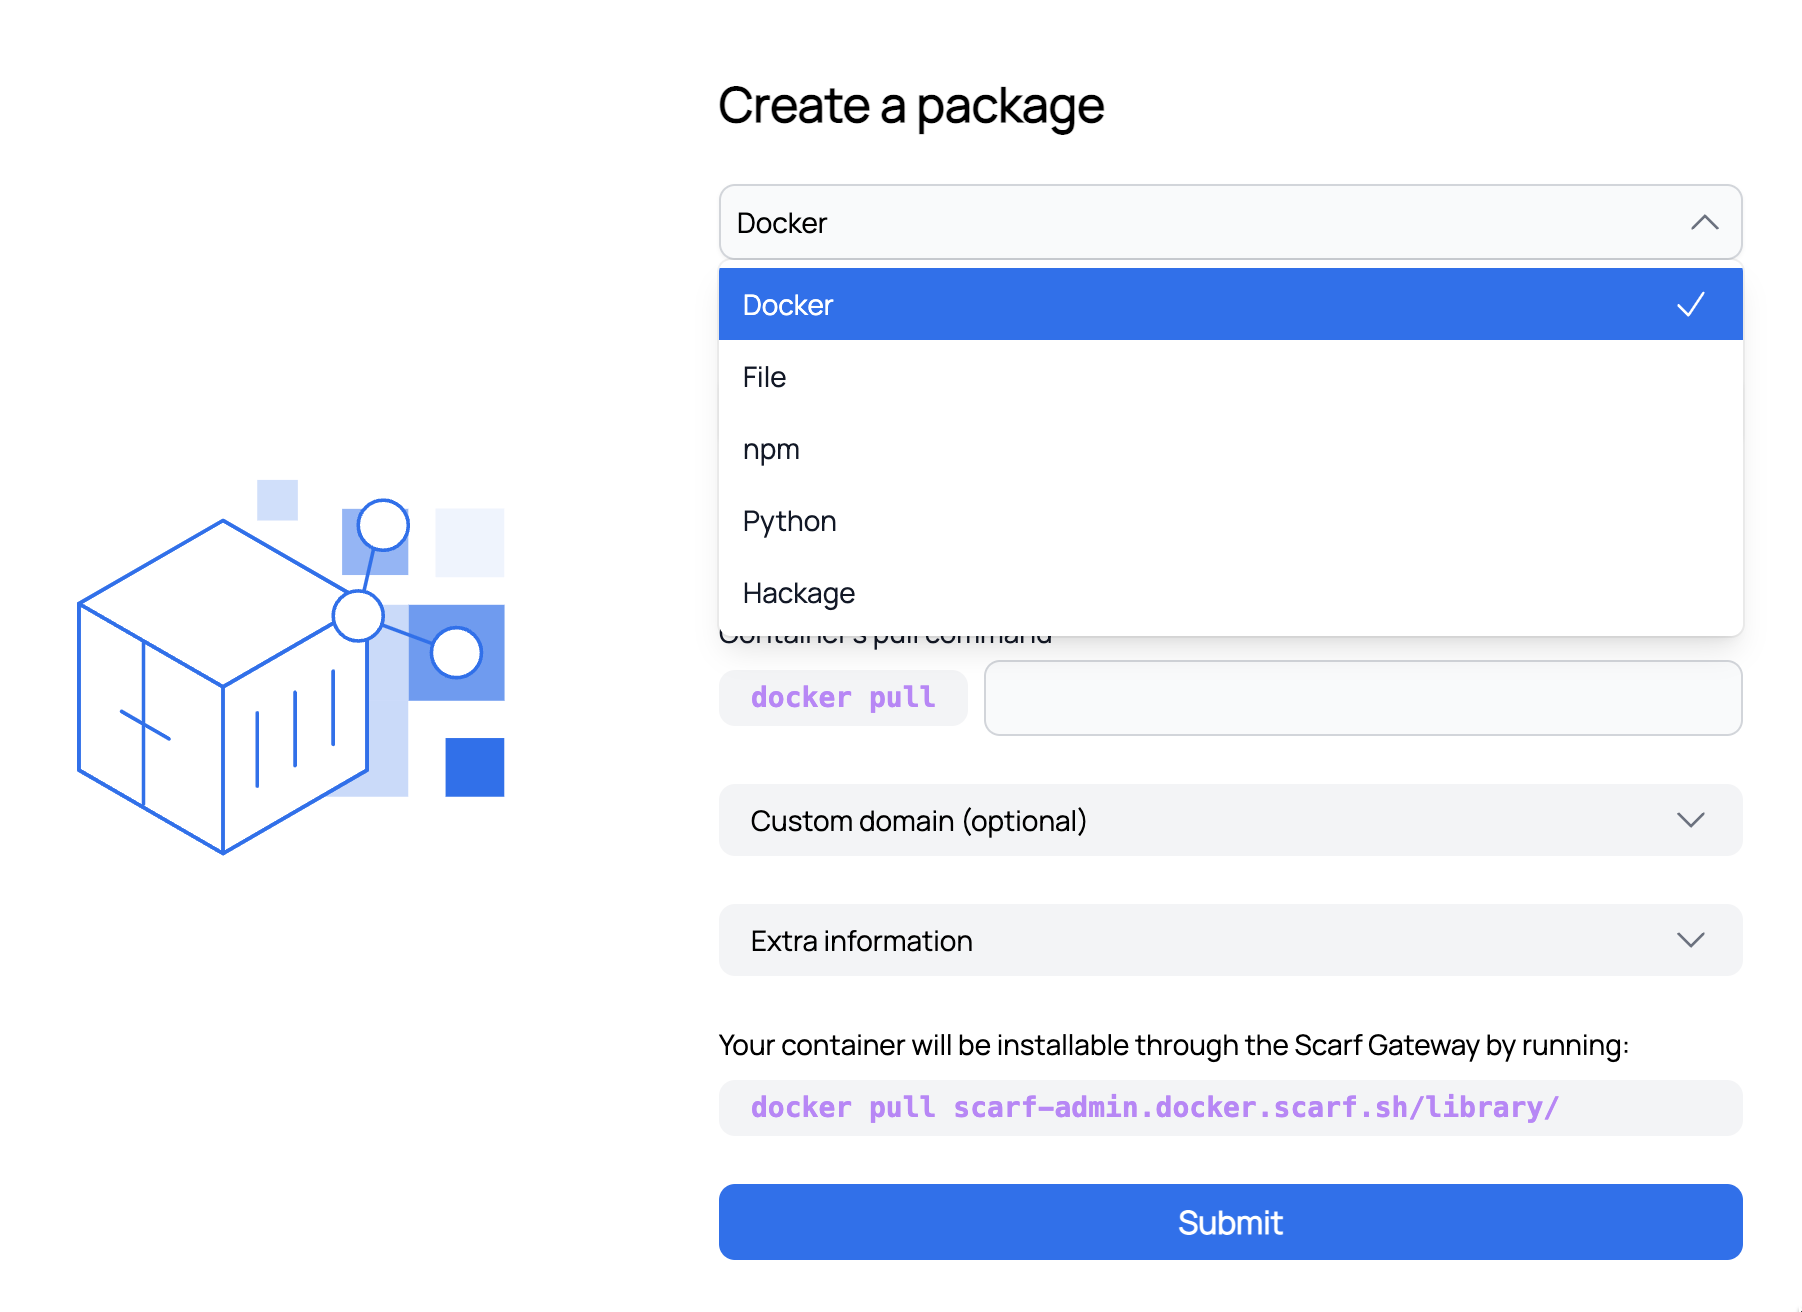
-
Enter the current pull command for your Docker container.
# `hello-world` package

docker pull hello-world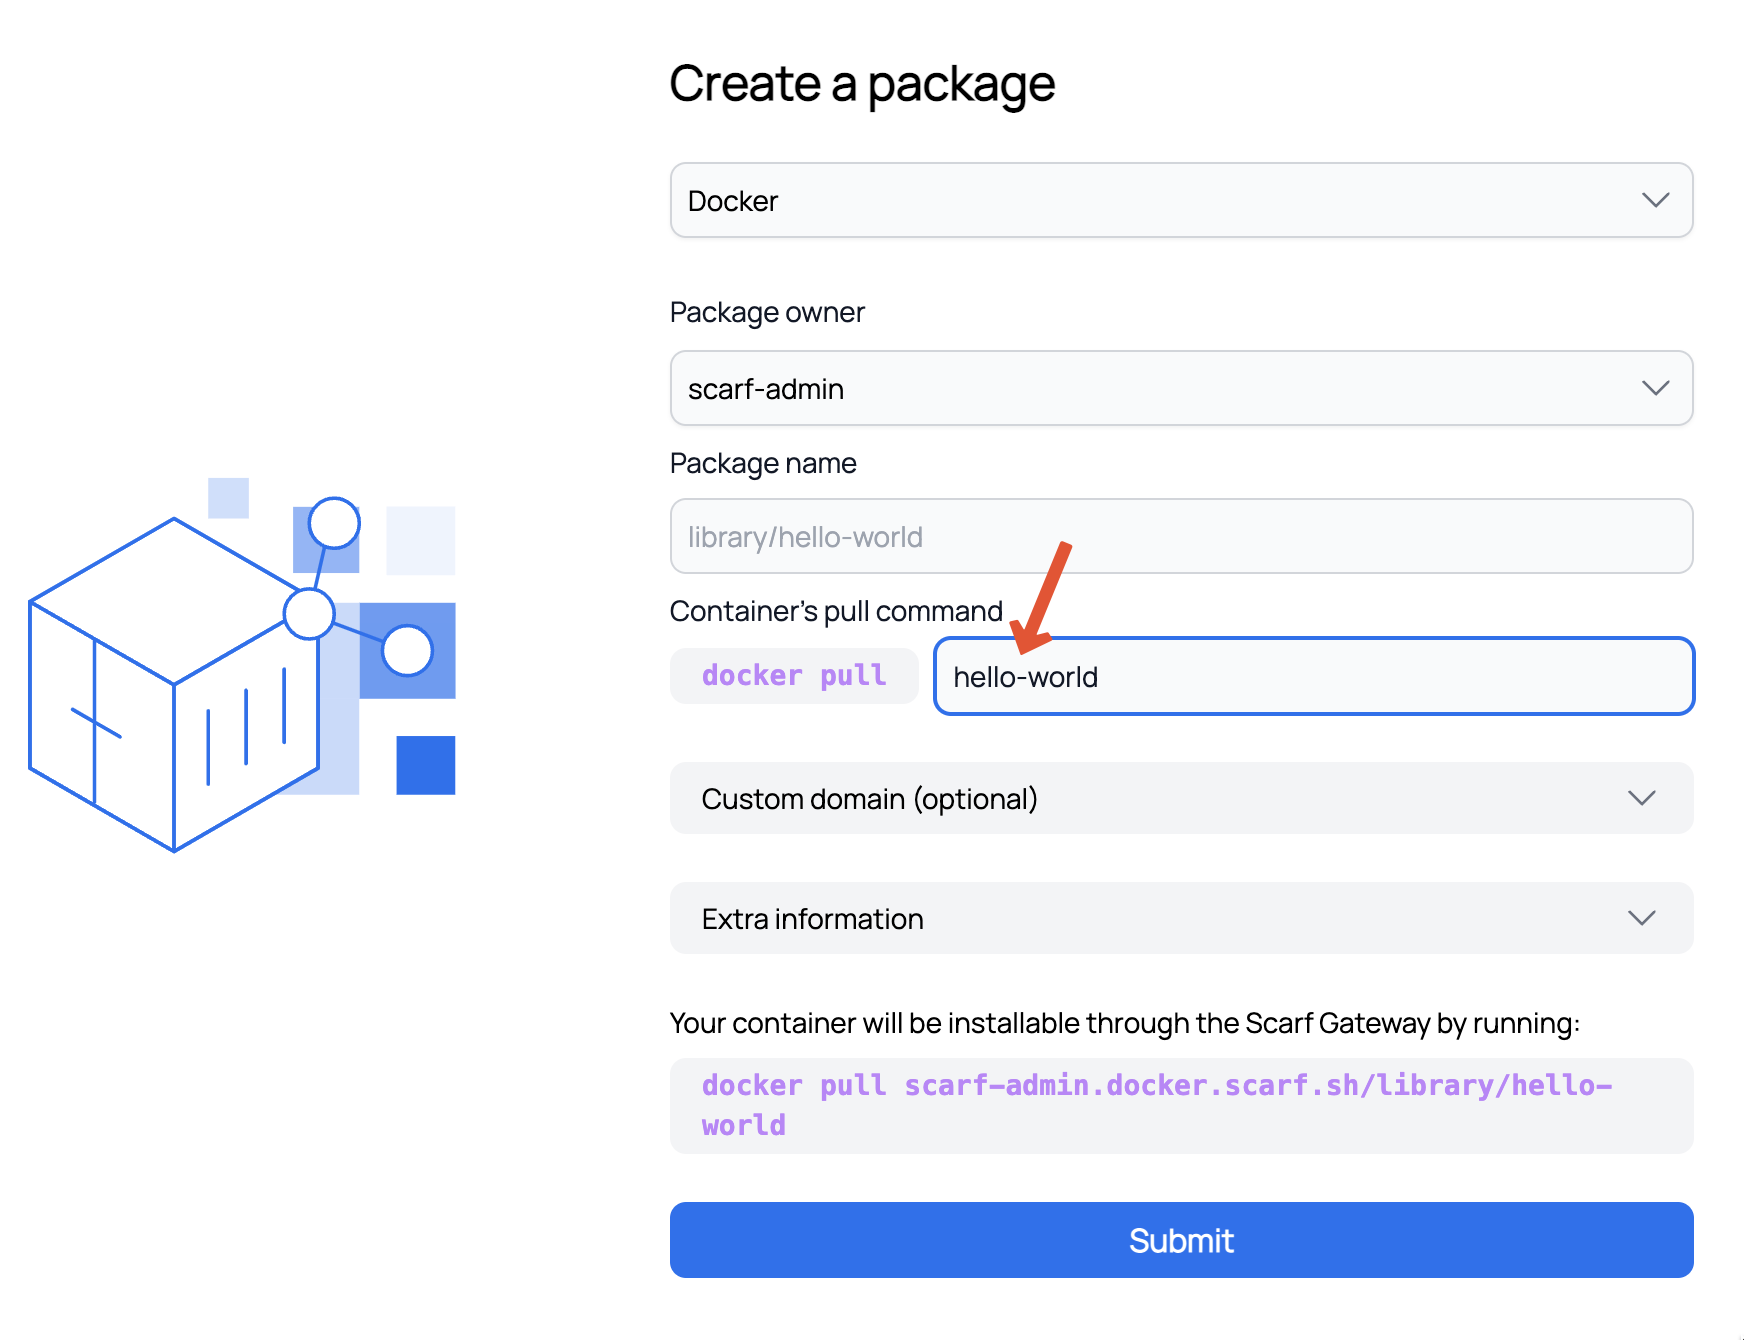
-
Optional: You can add a custom domain or use the domain provided by Scarf Gateway.
- Click the
Submitbutton to be redirected to a success screen with some additional information as to what you can do next. -
Click on on
Go to your packageto view your package details view.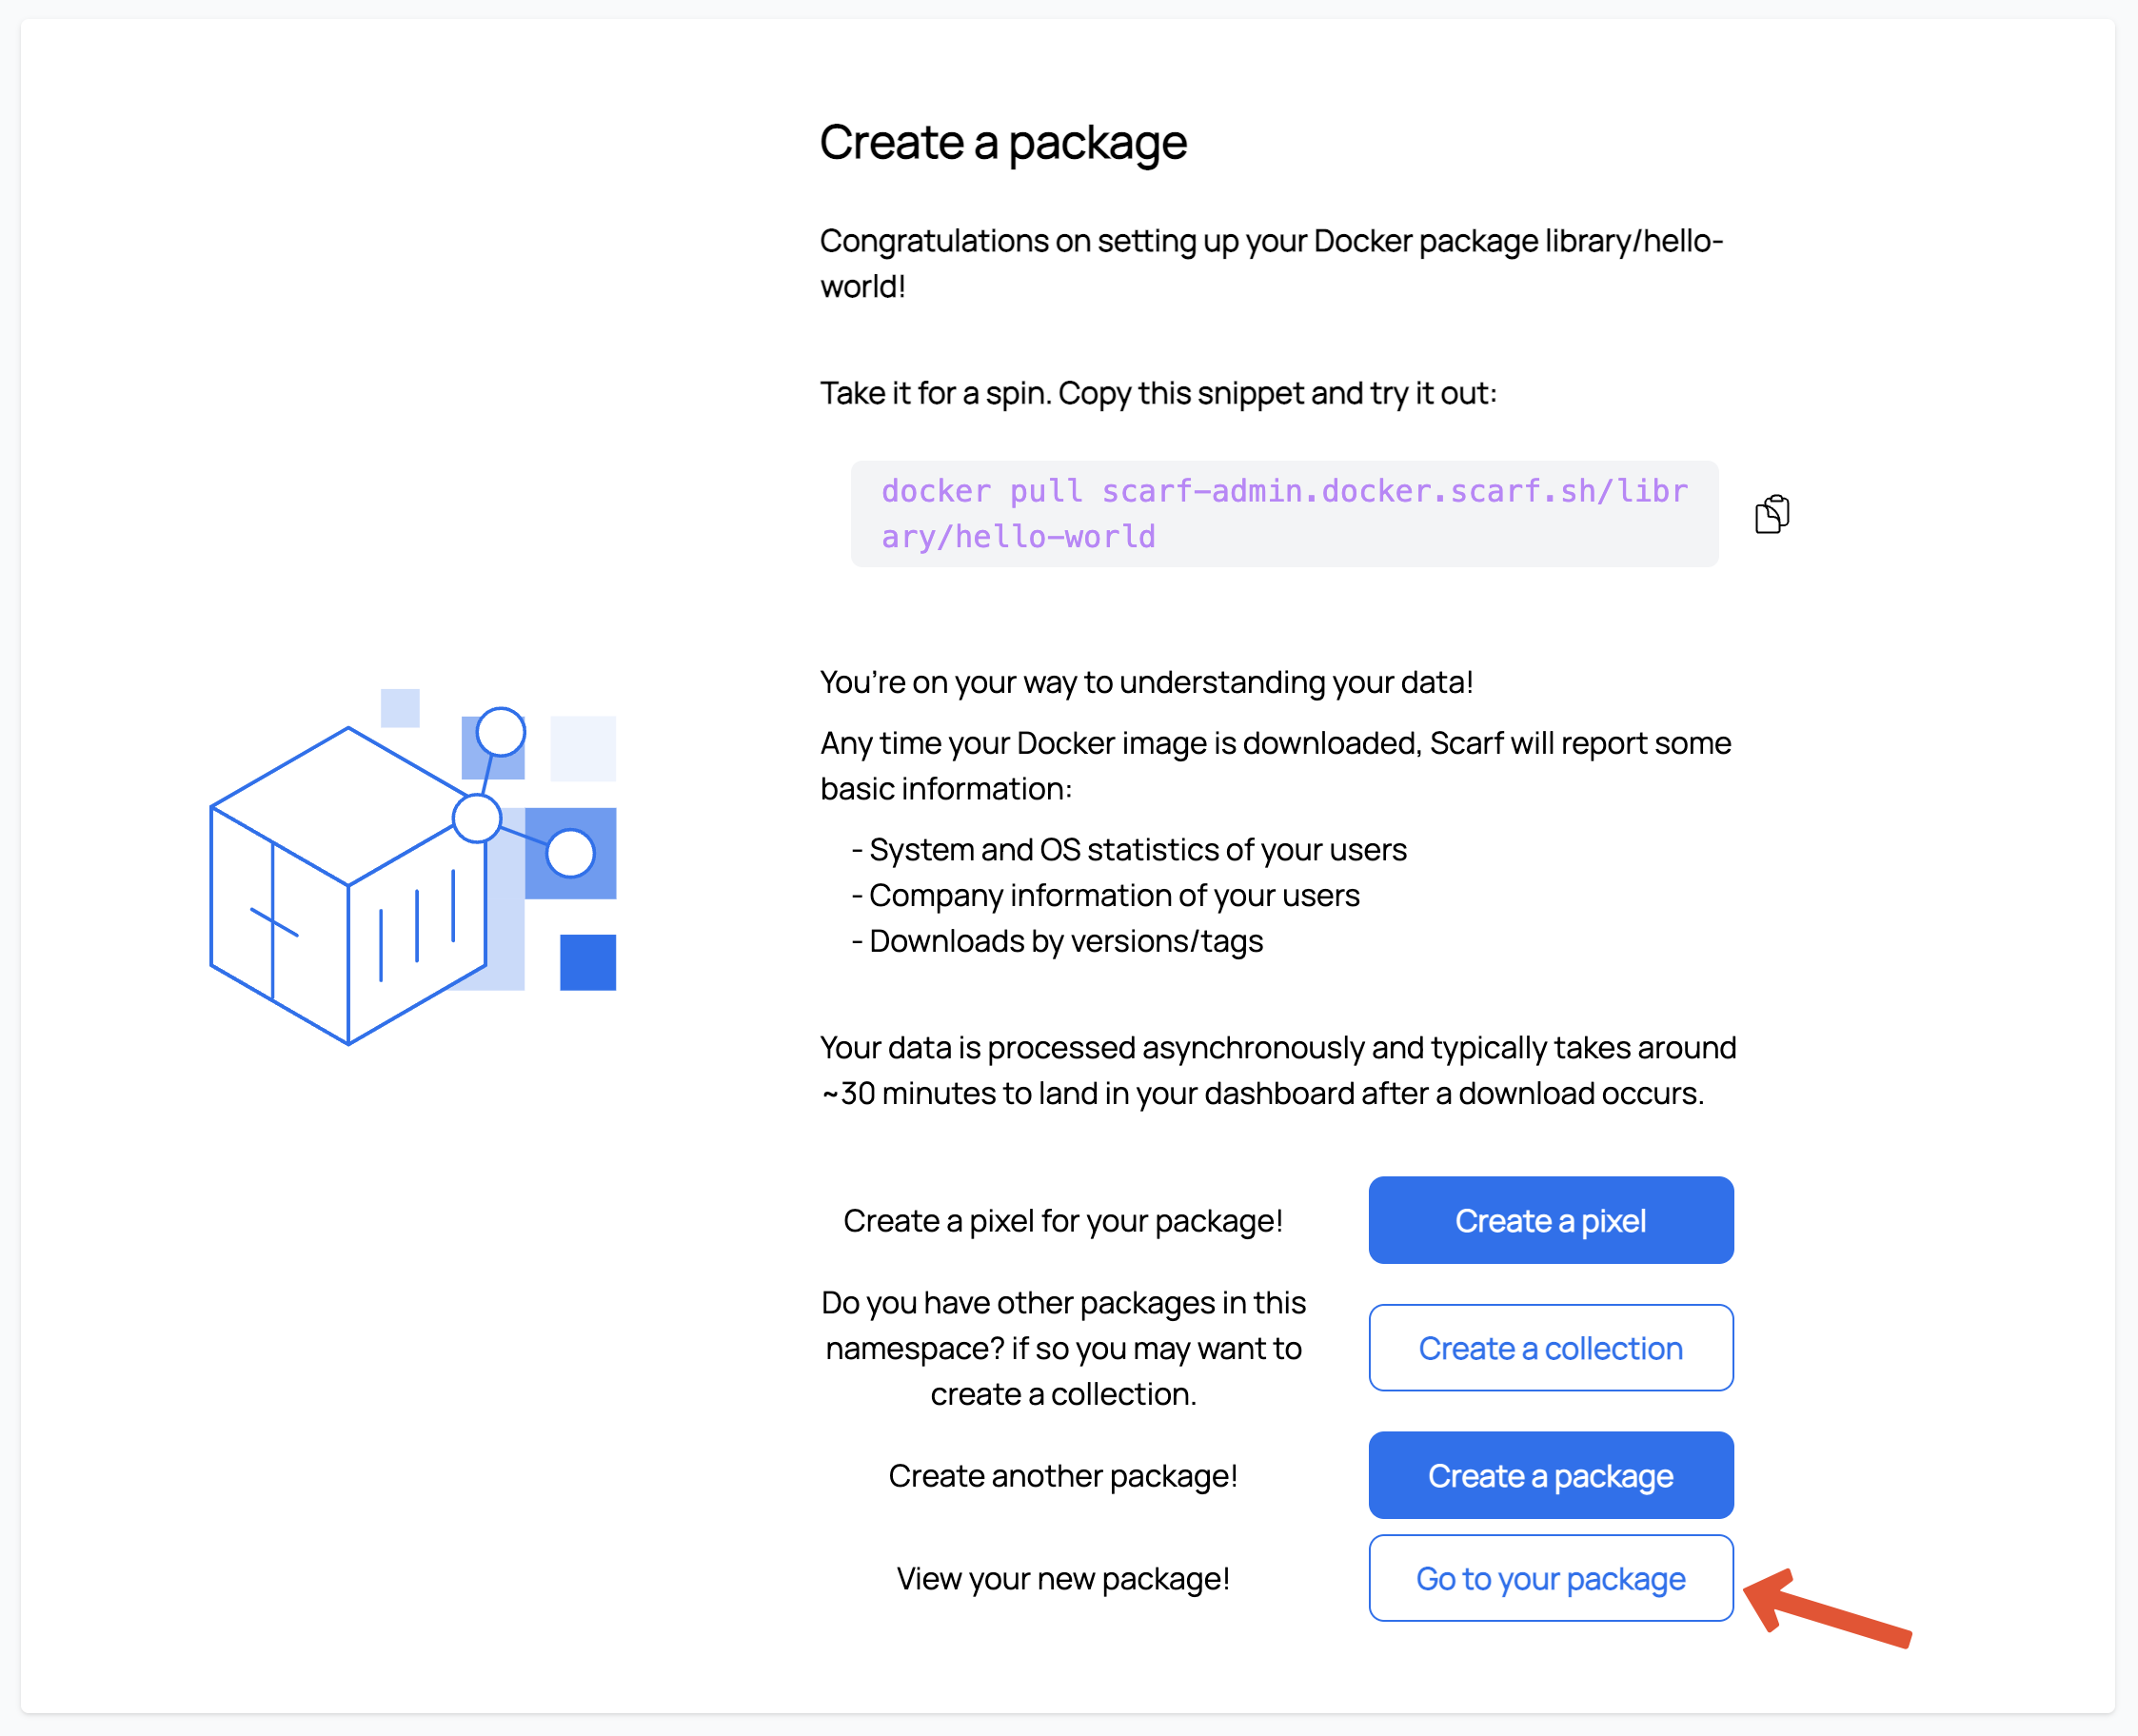
Now you’re all set to start tracking your Docker images with Scarf. Any time your image is downloaded, Scarf will report the following information:
- System and OS statistics of your users
- Company information of your users
- Downloads by versions/tags
In the next section, you will create a tracking pixel that can be added to your project’s documentation or any other web properties associated with your project.
Downloading Docker Packages
In this section you will download your package with the pull command found in your package dashboard to start fetching data.
-
Navigate to your package details view.

-
Copy the Pull command.
-
Navigate to a terminal on your computer and run the Pull command.
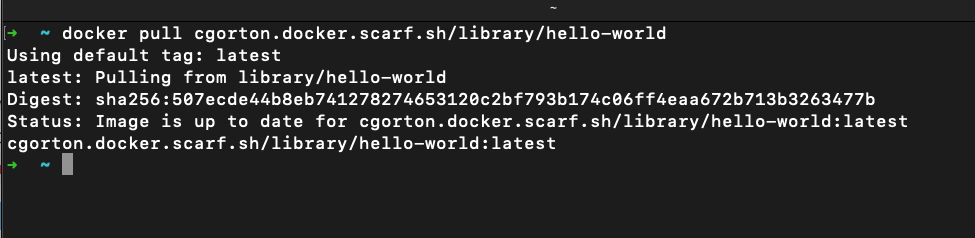
Note: Make sure the docker daemon is running on your computer. 6. Back to the package details view and click on
View Analytics. You should now see the Package Insights starting to populate with data. It will usually take 30 minutes and up to 2-3 hours before you see data pulled in. Every time a user pulls your Docker container images from Scarf Gateway the data in your Package Insights will be updated.
File Packages
File Packages on Scarf are a flexible and low-level package type that can track visits and downloads on arbitrary URLs. File packages were originally created to track published tar balls, but it has since expanded to many other use cases. You can think of File Packages as a powerful and fully customizable link shortener. Common use cases include:
- Tracking downloads of GitHub release artifacts
- Tracking downloads of every artifact on your company/project "downloads" page
- Tracking downloads of Homebrew packages from a tap/formula that you control
- Sending custom telemetry or other events from your application
- Tracking and attributing visits to marketing and sales content on your site.
Creating a File Package
-
Log in to your Scarf account.
-
Click the plus icon in the top right navigation, then select New Package.
-
In the first drop-down click on the package type you would like to create. For this section you will click
New File.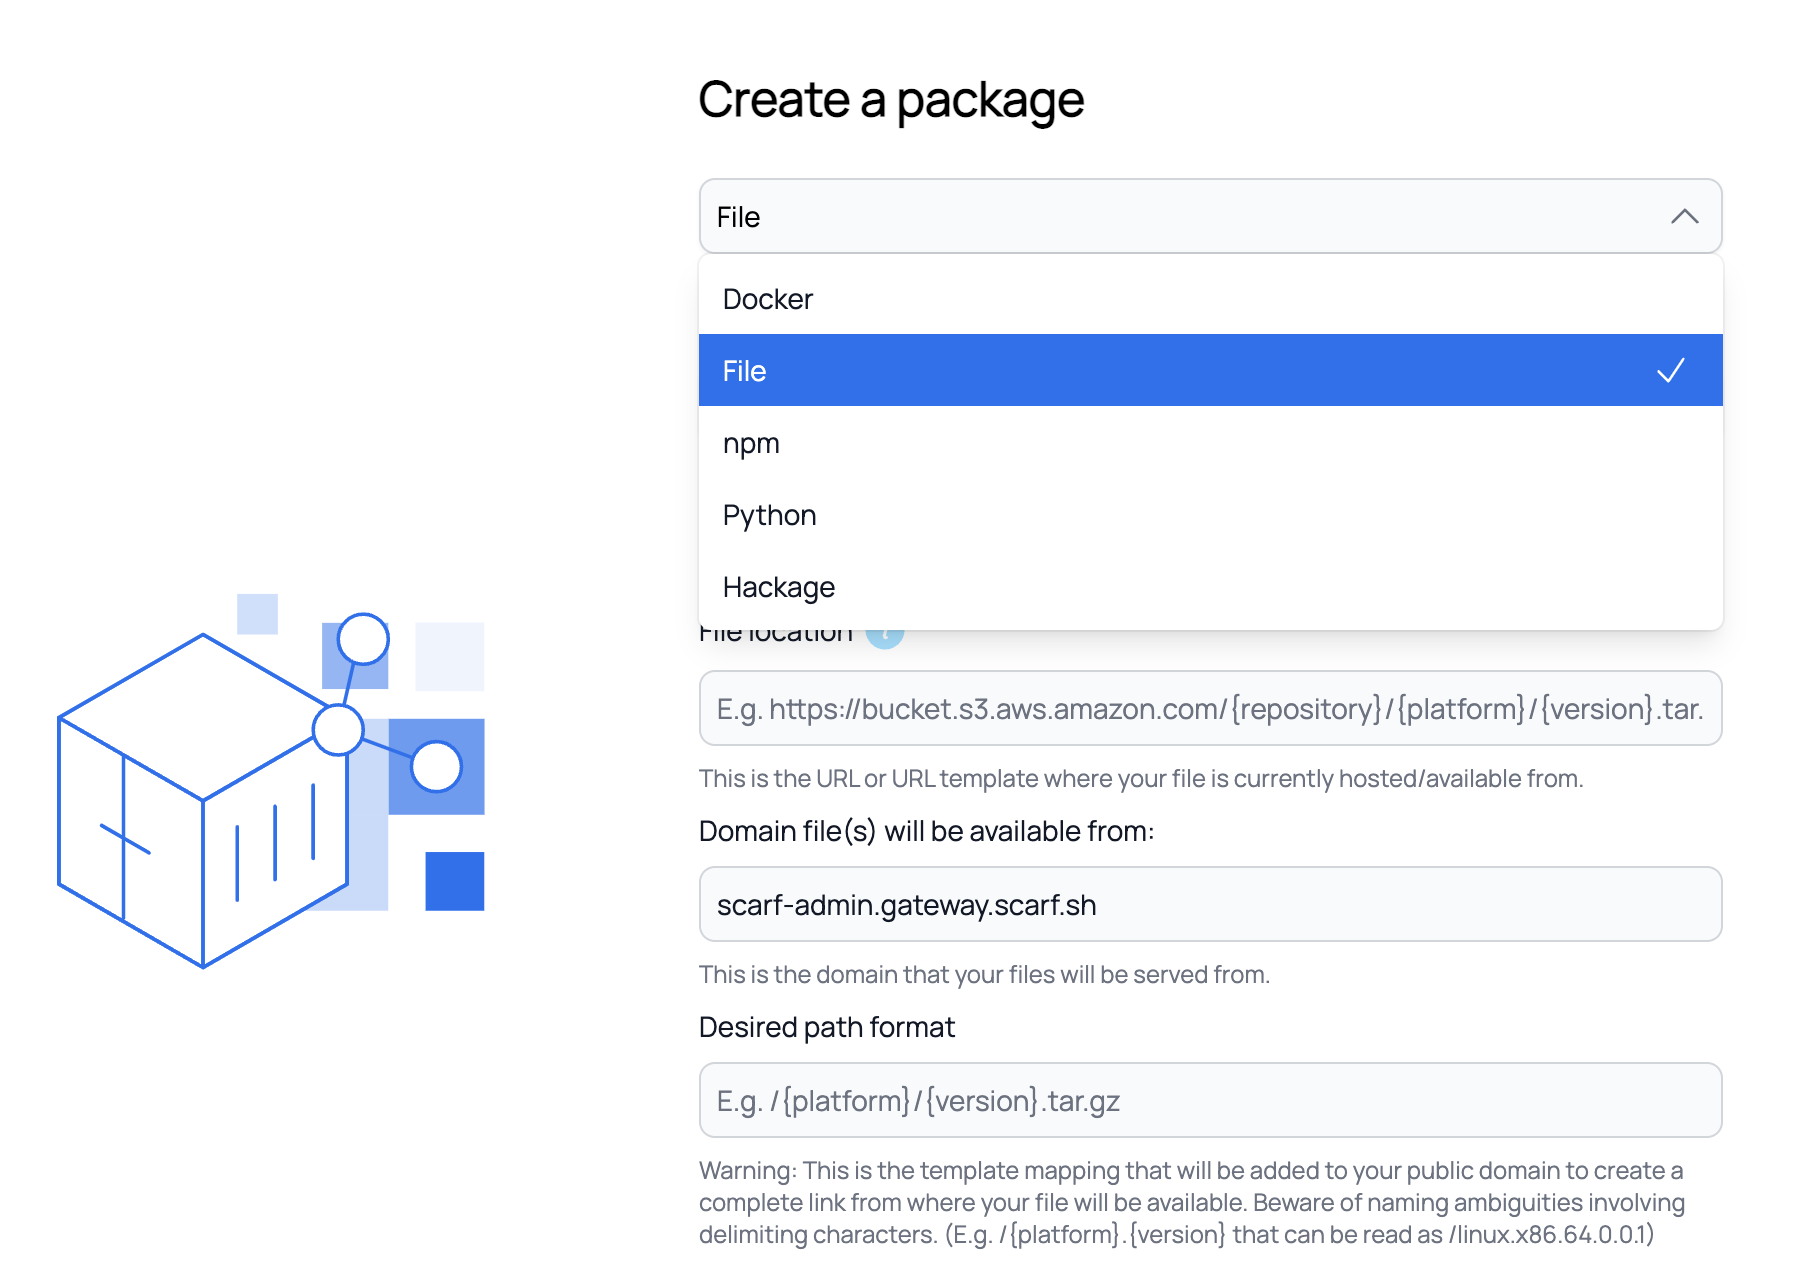
-
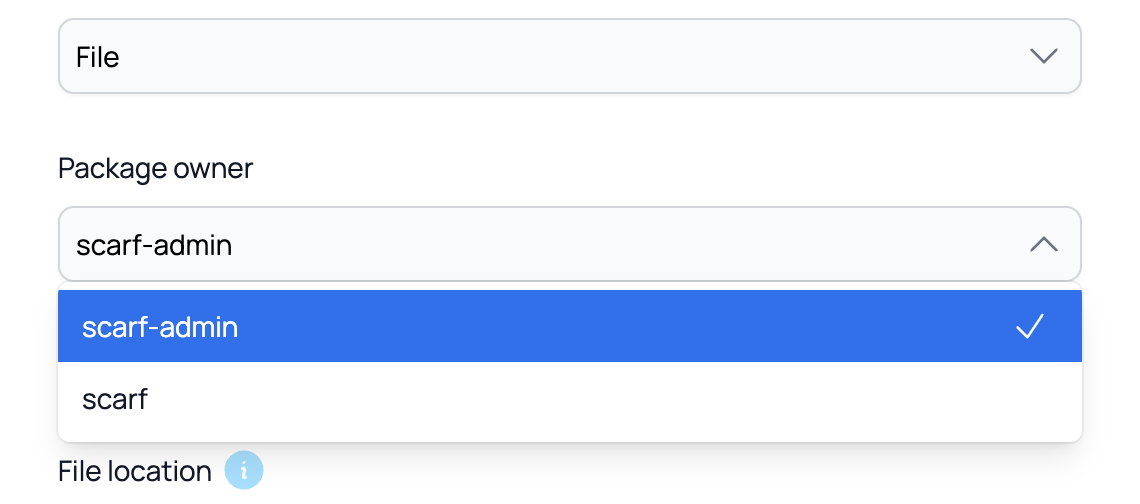
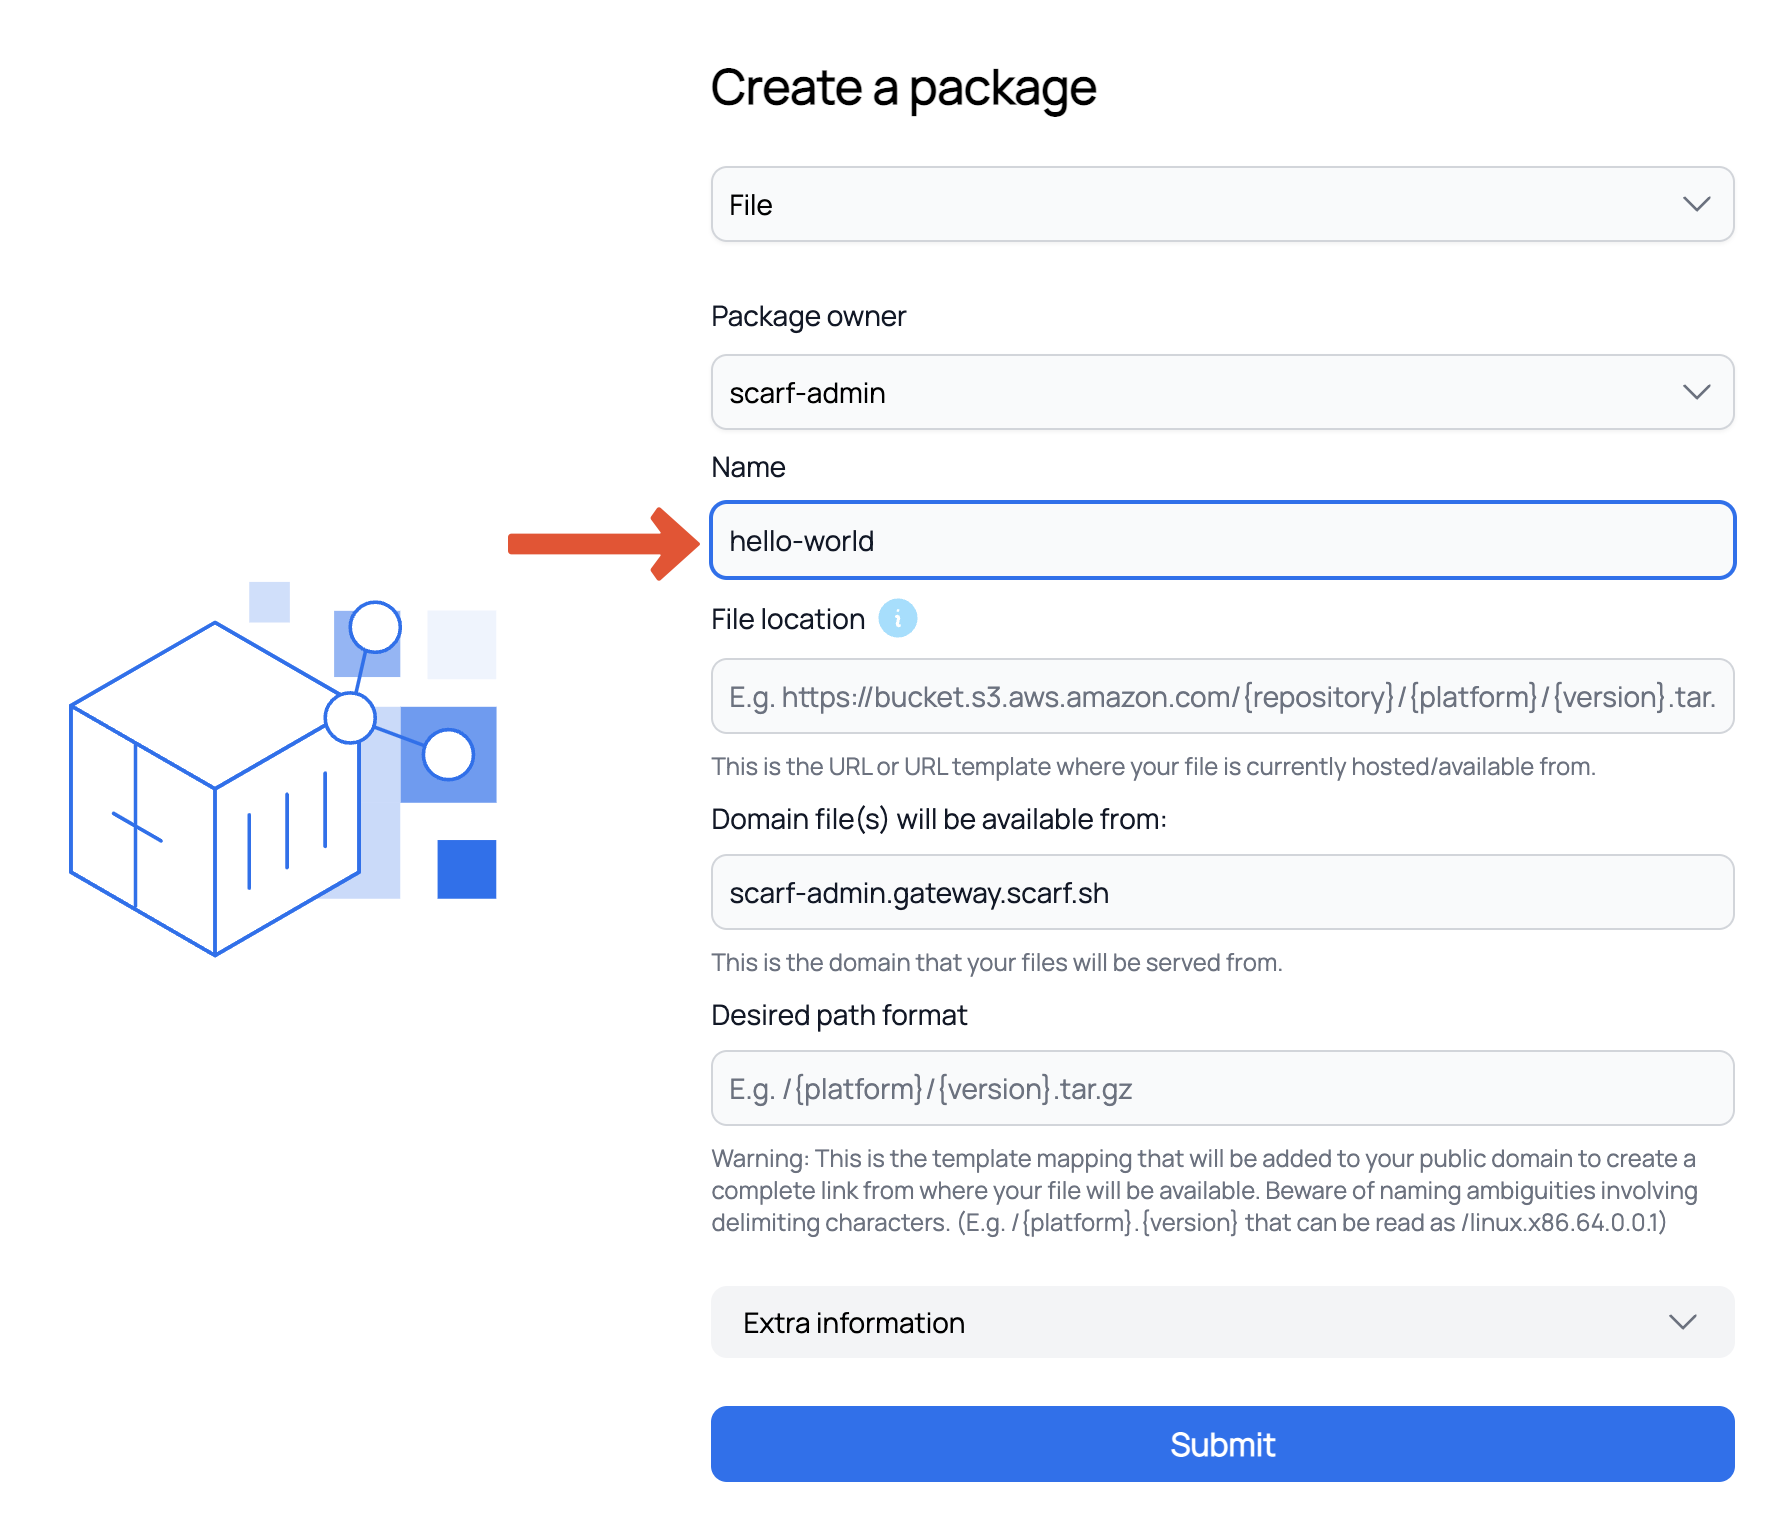
Select a package owner from the dropdown of Organizations you belong to.
-
Give your package a name.
Adding an Outgoing and Incoming URL
This section explains what the Outgoing and Incoming URLs are and how to use a URL template to dynamically route new URLs.
1.) Add the URL path where your files are currently located. You can add a simple URL or a URL template like in the example. https://www.example.com/mypath/{version}/{platform}.tar.gz
This example uses 2 variables {version} and {platform}.
Note: The Outgoing URL is the full URL to your asset on your HTTP/S hosting provider. It can be a URL template but if you use variables in your URL they need to also be used in your Incoming Path that define in the next step.
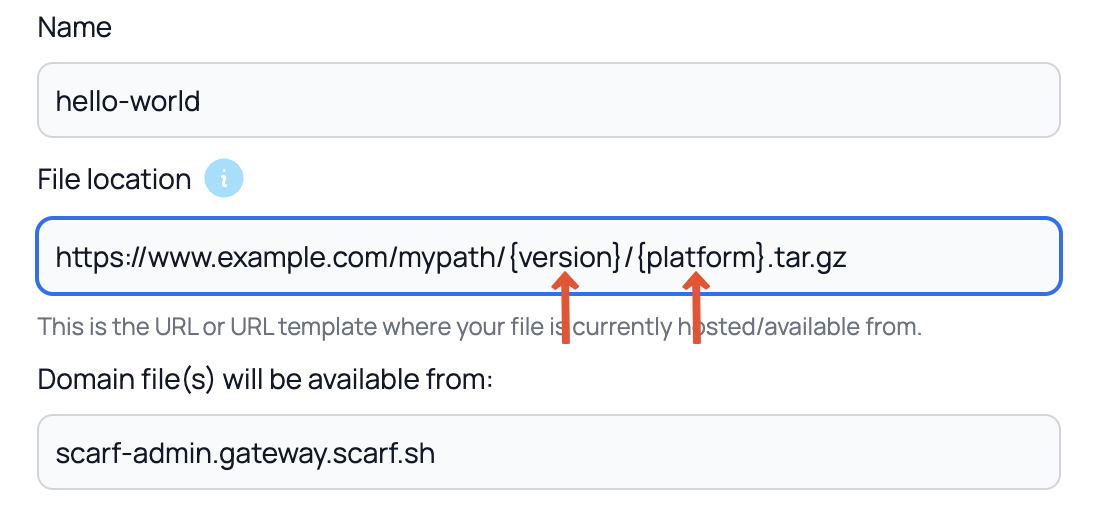
2.) Choose the domain where your files will be available from. You may choose to use your own domain for serving files. You may also choose to use <username>.gateway.scarf.sh provided by default by Scarf.
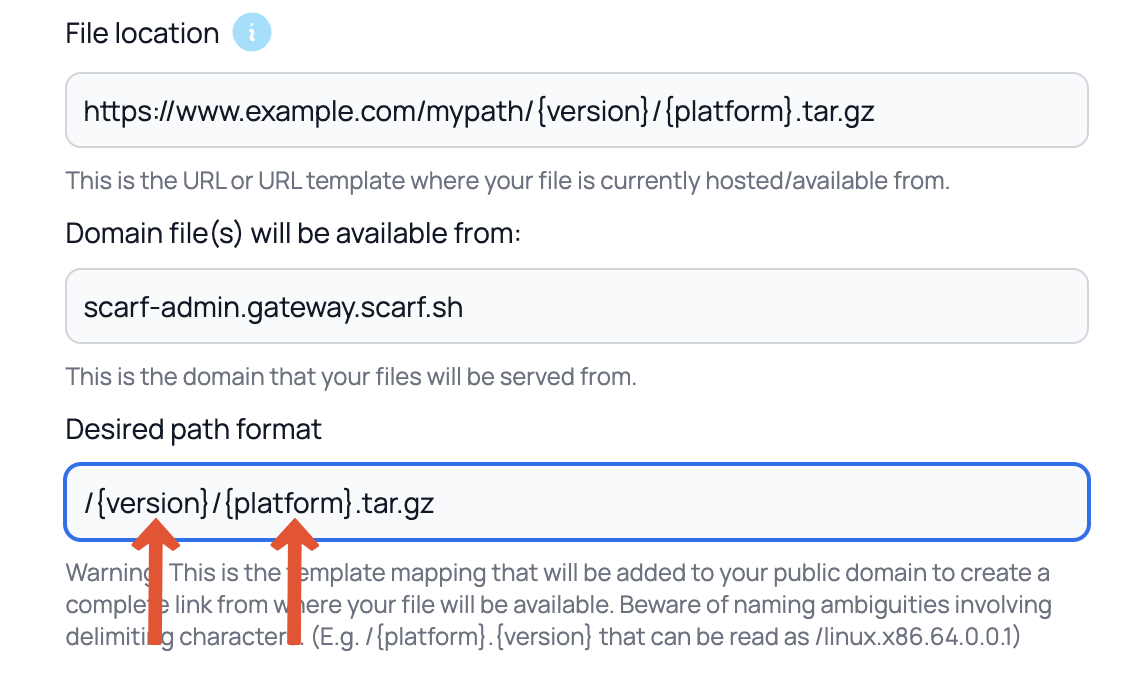
3.) Add the Incoming URL Path where Scarf will direct requests to fetch a file asset.
Note: Any variables used in your Outgoing URL path need to match your Incoming URL.
4.) Click Submit.
Adding Additional Routes
This example will show how to add an additional route. For curl-runnings an additional route that redirects to a specific version will be added, in this case, the most recent package release.
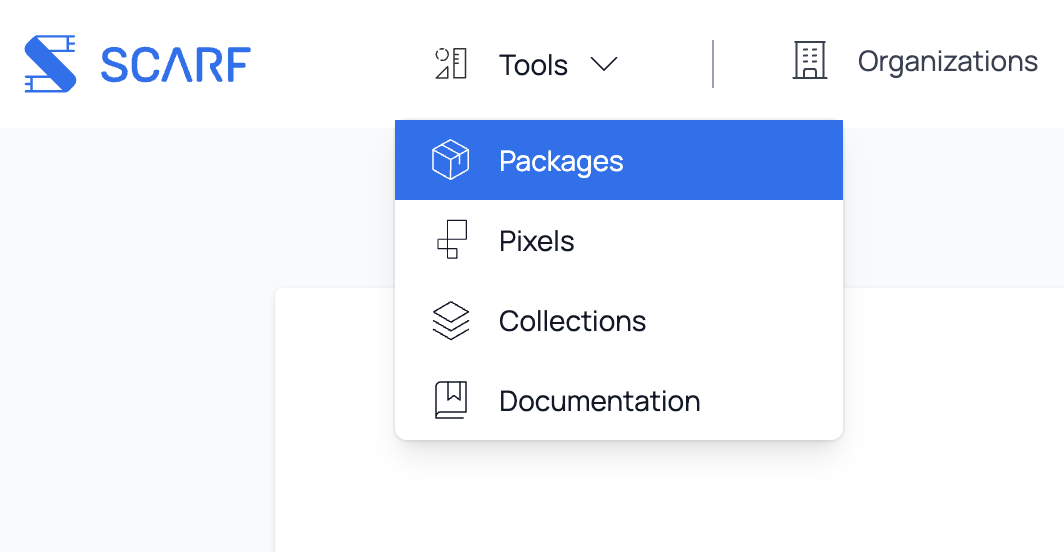
1.) In the top menu click on Tools then in the drop down menu click on Packages.
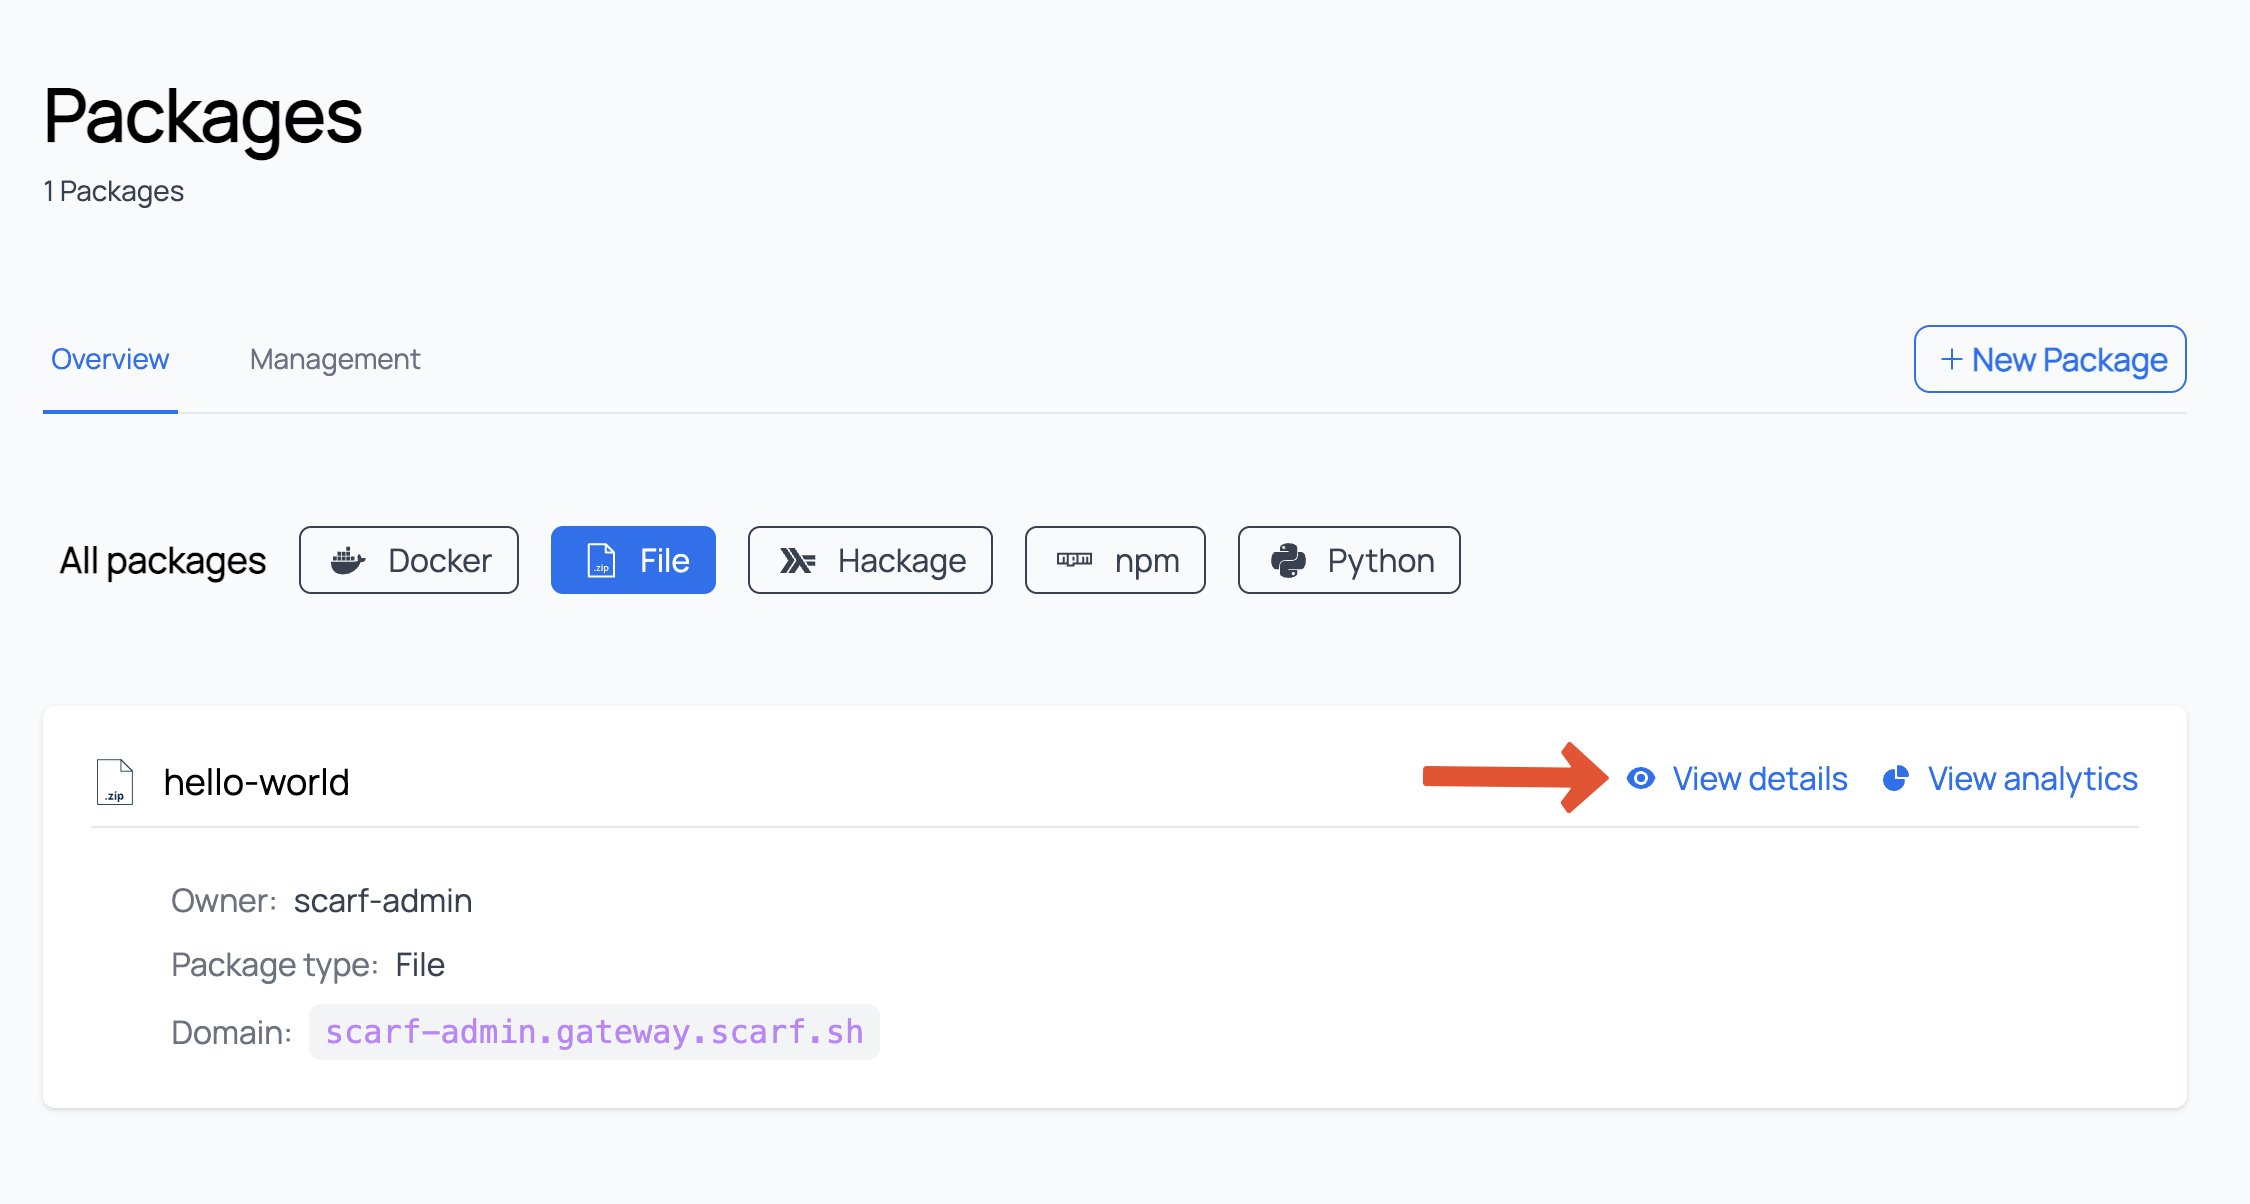
2.) In the package list dashboard there will be a list of all your packages. These can be filtered by type of packages by selecting the package types you'd like to see. In our example as we just created a file package we're going to want to select File.
3.) Navigate to our newly create file package and in the top right of the box click the View Details button.
4.) In the popup modal, use the File location input to add a new host URL. You can use a template URL here.
Example:
https://www.example.com/mypath/latest/{platform}.tar.gz
5.) Next, add the desired path format for your files. Make sure the variables from your Outgoing and Incoming URLs match if you use a template URL.
Example:
/latest/{platform}
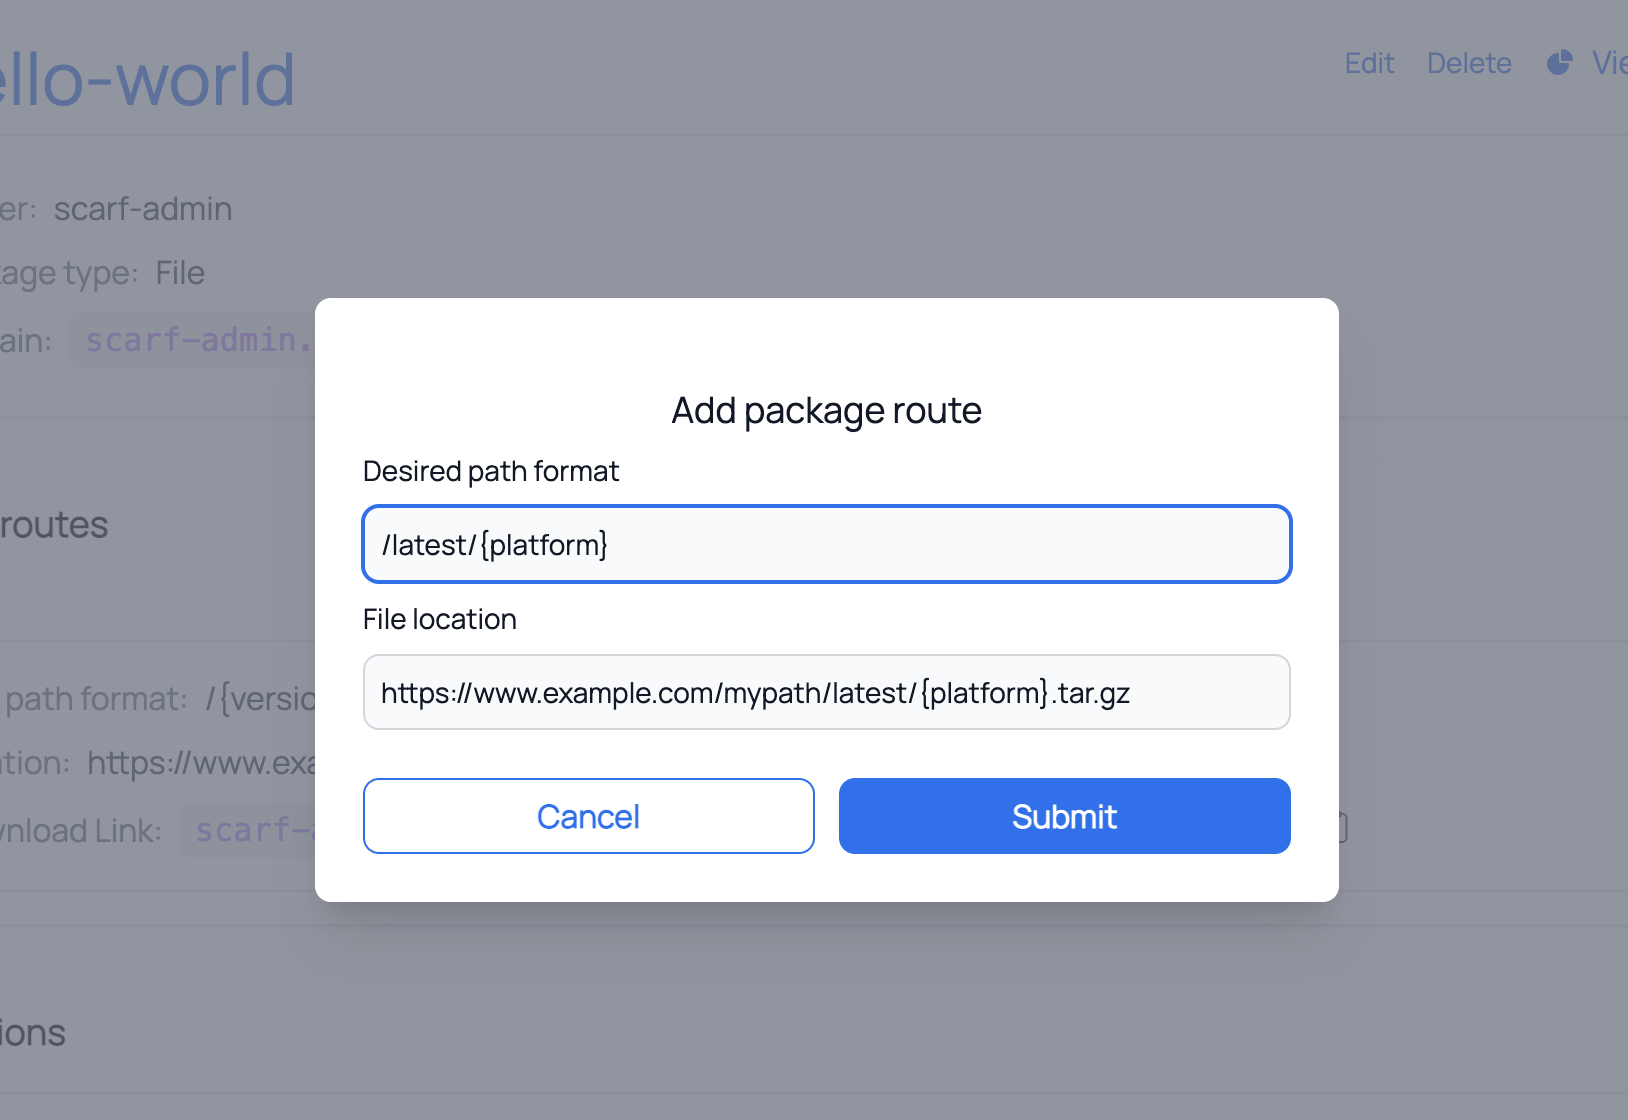
6.) Click the Submit button.
7.) The modal will close and you will see the additional route you just added.

Passing Variables in Request Bodies
File packages support passing variables in the request body as a JSON payload, similar to the external event import API. This allows you to send additional metadata and custom event data when sending telemetry to Scarf (in addition to path and query parameters).
In addition to the reserved variables listed below, you can also pass any custom variables in the JSON body, just like you can use variables in URL templates (e.g., {version}, {platform}). This provides flexibility to include any additional data relevant to your use case. Note that nested structures in the request body will be flattened, eg: {'a': {'b': 'c'}} flattens to: a.b=c as a single key/value pair in Scarf.
Example:
curl -X POST 'https://<your-domain>/<your-route>' \
  -H 'Content-Type: application/json' \
  -d '{"$type":"download","version":"1.2.3","platform":"linux","feature_flag":"on"}'
Supported Variables
When making requests to file packages, you can include the following variables in the request body:
$version (string)
If provided, this field tracks the version of the package download.
$type (string)
Specifies whether the event represents a download or view. Other type values are supported by Scarf's API, but they are currently unsupported in the Scarf application level and will be treated as downloads. Support for more event types is coming soon.
$remote_address (string)
Remote address of the event, which is used to retrieve IP-related metadata. If not specified, defaults to the remote address of the client making the request.
$user_agent (string)
Value of the client's user-agent header, which is used to extract metadata related to the client.
$domain (string)
Domain on which the event occurred.
$referrer (string)
Referrer of the client when the event occurred.
$headers (Array of objects)
Headers of the client's request when the event occurred. Each object can contain arbitrary property names as additional properties.
$time (string, date-time format)
Timestamp indicating when the event occurred. Alternatively, UNIX epoch time is also supported. This field is optional for file packages; if not provided, the event time will default to the time the request was received.
Note: The
$unique_idvariable is not yet supported for file package events. Also note that $package and $tracking_pixel are not supported, as the gateway URL path of your request and your Scarf Gateway configuration determine what package your event is sent to.
npm Packages
NPM Packages on Scarf are a convenient way to collect usage and event telemetry from your npm packages by adding a dependency on [scarf-js](https://www.npmjs.com/package/@scarf/scarf).
-
Log in to your Scarf account.
-
Click the plus icon in the navigation, then select New Package.
-
In the first drop-down, select
npmas the package type. -
Select the package owner from the dropdown list of Organizations you belong to.
-
Give your npm package a name. This name should match the name of your package on npm, or the same as the
namein yourpackage.json. -
Click Submit.
Configuring Telemetry for npm packages
Once an npm entry has been created, you are ready to configure your package by adding scarf as a dependency
npm i --save @scarf/scarf
Event Collection Packages
Event Collection Packages on Scarf are another flexible package type purpose built for telemetry data in general. Event data can be sent to a public Scarf Gateway URL of your choice, or by bulk ingesting events through our authenticated API. Event Collection Packages are an alias of File packages and share all the same traits. Common use cases include:
- Sending custom telemetry or other events from your application
- Importing historical event data from an external application into to Scarf
Creating an Event Collection Package
-
Once signed in to Scarf, navigate to the home page.
-
Click plus icon in the navigation, then select New Package.
-
In the first drop-down click on the package type you would like to create. For this section you will click
Event Collection. -
Select the package owner from the dropdown.
-
Give your package a name.
-
Add the URL path where your events will be collected. This is the user visible endpoint your application will connect to for event submission. This setting while required is not relevant when submitting events via the Event Import API.
Note: You can use a URL template, but if you use variables in your URL, they must be present in order for the event to match your route and be collected successfully. Depending on your use case, it may be better to simply pass event data via query parameters and leave your route as something simple and static.
-
Choose the domain where your events will be submitted. You may choose to use your own domain or you may choose to use
<username>.gateway.scarf.shprovided by default by Scarf. -
Click Submit.
-
Once an Event Collection package has been created, you are ready to collect Custom telemetry
Python Packages
Scarf Gateway configuration for a Python package entry has three main considerations:
- pip Command: This is the current pip command used to install your package. For packages on PyPI.org, this will be of the form pip install my-pkg and will include the
--extra-index-url https://my-python-project-domain.comif your package is hosted elsewhere. This defines the location where the users will be redirected to when installing your package. - Domain: This can be your own domain, or a Scarf-supplied domain, of the form
<username>.gateway.scarf.sh. By default, your Scarf domain will be used if this field is left empty. - Telemetry: This allows you to gather insights into how your package is used without collecting any personally identifiable information.
Installing Python packages via requirements.txt
Add the --extra-index-url option at the top of your requirements.txt:
--extra-index-url https://my-python-project-domain.com/simple/
my-pkg==0.0.1
NOTE: We have noticed indeterminate behavior in some versions of Pip that have resulted in the public registry being used for download regardless of the --extra-index-url addition.
If you elect to use your own domain, you'll need to add a CNAME for that domain to gateway.scarf.sh. Additionally we require you to verify your ownership of the domain by setting a TXT with a value that Scarf provides upon package creation. See your DNS provider's instructions for how to add CNAME and TXT records.
If you have questions or need help, join our Slack community.